Building a home electronics lab can be a rewarding hobby. It offers endless possibilities for creativity and learning.
Imagine having a space where your ideas come to life with circuits and gadgets. A home electronics lab is not just about collecting tools. It’s a place where curiosity meets innovation. Why start a home electronics lab? It allows you to explore technology hands-on.
You can work on projects at your own pace. This space becomes your sanctuary for experimenting and problem-solving. Whether you’re fixing old devices or creating new ones, it nurtures your skills. Plus, it’s a great way to understand how everyday electronics function. A home lab brings theory into practice, turning abstract concepts into tangible results. It’s a fun, educational journey right from your home.

Credit: knowhow.distrelec.com
Setting Up Your Lab
Creating a home electronics lab requires careful organization. Start with essential tools like multimeters and soldering kits. Arrange components on a sturdy workbench for easy access.
Setting up your home electronics lab is an exciting step towards diving deeper into the world of technology and innovation. Whether you’re a hobbyist or an aspiring engineer, having a dedicated space for your projects can spark creativity and enhance productivity. But where do you start? Let’s break down the essentials. ###Choosing The Right Space
Selecting the perfect spot for your electronics lab is crucial. Ideally, you want a quiet corner free from distractions. Consider a spare room or even a section of your garage. Ensure the area has good lighting. This will help you see small components clearly and prevent eye strain. Access to a power outlet is essential—running extension cords across the room isn’t safe or practical. Think about ventilation. If you’ll be soldering or working with chemicals, proper airflow is important. A window or a small fan can make a significant difference. ###Essential Tools And Equipment
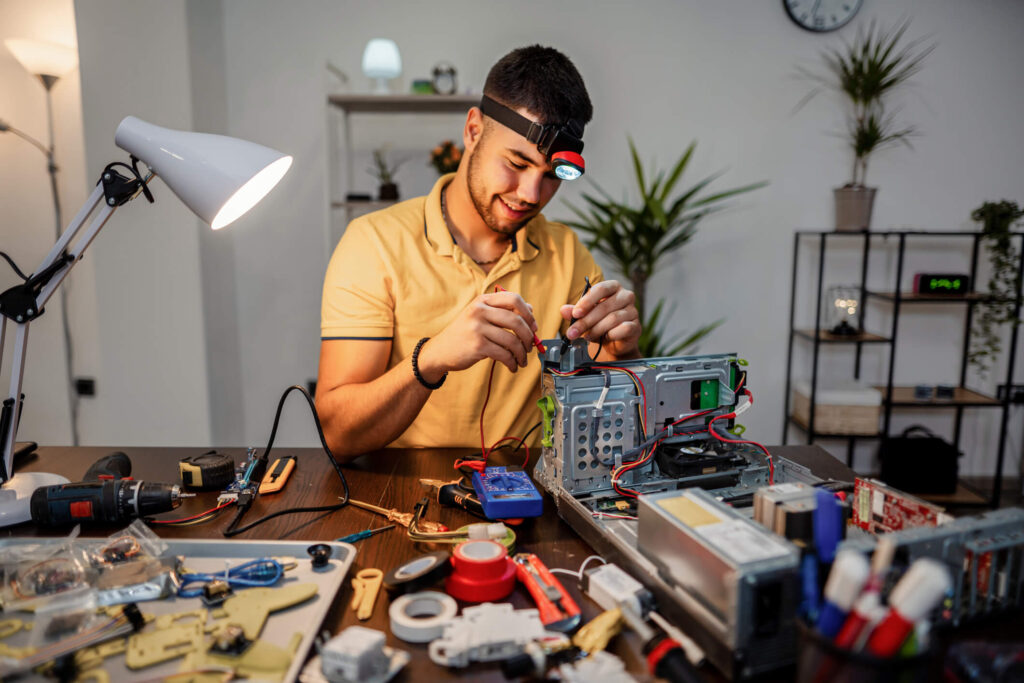
Equipping your lab with the right tools will set the foundation for your projects. Start with a basic toolkit: a multimeter, soldering iron, and a set of screwdrivers are must-haves. A breadboard and some jumper wires are great for experimenting with circuits without permanent connections. They allow you to test ideas before committing to a final design. Consider investing in an oscilloscope. It’s a bit of a splurge, but immensely helpful for visualizing electrical signals. Safety gear is non-negotiable. Protective eyewear and a fire extinguisher should be within arm’s reach. Remember, being prepared is better than being sorry. Now, as you gather these tools, think about the projects you’ve always wanted to tackle. What could you achieve with the right setup?Safety Measures
Ensure safety in your home electronics lab by wearing insulated gloves and goggles. Keep a fire extinguisher nearby. Always unplug devices before working on them to avoid electric shock.
Creating a home electronics lab is an exciting endeavor that opens up a world of innovation and experimentation. However, ensuring safety is paramount to protect yourself and your surroundings. Implementing effective safety measures is not just a recommendation but a necessity to enjoy your hobby without unwanted incidents. Let’s dive into some practical safety guidelines. ###Handling Electronics Safely
When working with electronics, handling them safely is crucial. Always disconnect power sources before making adjustments or repairs. Use insulated tools to prevent electric shocks. Wear protective gear like safety goggles and gloves. This simple step guards against burns or injuries from unexpected sparks. Keep a fire extinguisher nearby. In case of an electrical fire, it could be a lifesaver. Have you ever thought about how quickly a small spark can escalate? ###Proper Ventilation And Lighting
Proper ventilation is essential in any electronics lab. Fumes from soldering or other processes can be harmful. Ensure your workspace is well-ventilated to avoid inhaling toxic substances. Consider setting up a small exhaust fan. It helps in removing harmful fumes quickly, keeping the air fresh and breathable. Lighting plays a pivotal role in safety. Good lighting reduces eye strain and helps you see small components clearly. Have you noticed how a well-lit space can boost your focus? Opt for LED lights that provide bright, even illumination without generating heat. This choice keeps your workspace comfortable and safe. Prioritizing these safety measures not only enhances your efficiency but also ensures a secure and pleasant environment for your home electronics lab. What steps will you take today to make your lab safer?Basic Electronic Components
Creating a home electronics lab requires understanding basic electronic components. These components form the backbone of all electronic devices. They control electricity flow and enable various functions. Learning about them helps build and repair electronic circuits. Let’s explore some key components used in electronics.
Understanding Resistors And Capacitors
Resistors limit the flow of electric current. They are essential in controlling voltage and current in a circuit. Resistors come in different sizes and resistances. The resistance value is measured in ohms. They help protect components from excessive current.
Capacitors store and release electrical energy. They stabilize voltage and power flow in circuits. Capacitors are used in power supplies and signal processing. They come in various types, such as ceramic and electrolytic. Each type serves a different purpose in electronics.
Using Integrated Circuits
Integrated circuits (ICs) are miniaturized electronic circuits. They contain many components like resistors and transistors. ICs perform various functions in electronic devices. These functions include amplification and data processing.
ICs are used in computers, mobile phones, and other gadgets. They help in making devices smaller and more efficient. Understanding ICs is crucial for working with modern electronics. Many ICs are designed for specific tasks, making them versatile.
Building Simple Circuits
Building simple circuits is an exciting way to learn electronics. You will explore how components work and interact with each other. It is a hands-on experience that brings theoretical concepts to life. With basic tools and a few materials, you can create functional electronic devices. Start by understanding basic components like resistors, capacitors, and transistors. These are the building blocks of circuits.
Breadboarding Basics
Breadboards are essential for testing and developing circuits. They allow you to connect components without soldering. This makes it easy to change parts and correct mistakes. Breadboards have rows of holes that hold wires and components. Use jumper wires to connect different parts of your circuit. Make sure your connections are secure to avoid loose connections.
Soldering Techniques
Soldering is a skill that joins components permanently. It involves melting solder to connect metal parts. A soldering iron heats the solder and melts it onto the connection point. It is important to use the right amount of heat. Too much heat can damage components, while too little heat will not melt solder. Practice makes perfect, so start with simple joints. Always work in a well-ventilated area to avoid inhaling fumes.
Programming And Microcontrollers
Home electronics labs open a world of creativity and innovation. Central to this are programming and microcontrollers. They bridge the gap between your ideas and functional projects. With them, you can automate tasks, create smart devices, and learn valuable skills. These tools empower you to bring your electronic dreams to life.
Introduction To Arduino
Arduino is a popular microcontroller platform. It’s user-friendly and beginner-friendly. You can create interactive projects with simple code. Arduino boards come in various models and sizes. They are versatile and cater to different needs. You can control lights, motors, and sensors easily. Libraries and tutorials are abundant online. This makes learning Arduino accessible and enjoyable.
Exploring Raspberry Pi
Raspberry Pi is a compact computer. It’s powerful yet affordable. You can run a full operating system on it. This makes it ideal for complex projects. Use it to learn programming languages like Python. It supports a wide range of applications. From home automation to media centers. Raspberry Pi fosters creativity and technical skills. A vibrant community supports your learning journey.
Credit: knowhow.distrelec.com
Innovative Project Ideas
Creating projects in a home electronics lab is exciting and rewarding. It offers endless possibilities to combine creativity and technology. Whether you’re new or experienced, there’s always something new to build. Let’s explore some innovative project ideas. These projects can transform your space and boost your skills.
Smart Home Devices
Building smart home devices can make life more convenient. Think about creating a smart light system. Control it with your smartphone. Or design a smart thermostat to manage your home’s temperature. You can even build a smart doorbell with a camera. It lets you see who’s at your door from anywhere. These projects not only make your home smarter but also save energy and time.
Diy Robotics Projects
Robotics projects are perfect for tech enthusiasts. Start with a simple robot that moves and turns. Use sensors to make it avoid obstacles. Build a robotic arm for picking up objects. It can be a fun challenge. You could also create a line-following robot. It uses sensors to follow a path. Robotics projects teach problem-solving and coding skills. And they’re fun to watch in action.
Troubleshooting Tips
Fix common issues in your home electronics lab with these tips. Check connections and power sources first. Ensure devices are compatible and settings are correct.
Diving into the world of electronics can be both exciting and challenging. One of the most rewarding aspects is solving problems that arise while tinkering in your home electronics lab. Understanding how to troubleshoot effectively can save you time, money, and frustration. Here are some practical tips to make your troubleshooting process smoother and more efficient. ###Identifying Common Issues
Before you can fix a problem, you need to know what it is. Start by checking the power supply. Is it connected properly? A loose or disconnected wire could be the culprit. Next, examine the components. Are any of them visibly damaged or burnt? Sometimes, a simple visual inspection can reveal the source of the issue. Consider the environment. Excessive heat or moisture can affect electronic components. Ensure your workspace is dry and at a suitable temperature. ###Effective Problem Solving
Once you’ve identified potential issues, it’s time to solve them. Begin with the simplest solution. Replace faulty components with known good ones to see if the problem persists. Use a multimeter to test voltages and continuity. This can help pinpoint where the circuit is failing. Document your steps. Keep a notebook handy to jot down what you’ve tried. This not only helps you remember but also prevents repeating the same steps. Finally, ask yourself: are you overlooking something simple? Sometimes the smallest details, like a flipped switch or a wrong setting, can solve the biggest headaches. By following these tips, you’re not just fixing problems; you’re honing your skills and building confidence in your ability to handle whatever your home electronics lab throws your way.Resources And Community
Building a home electronics lab is an exciting journey. Resources and community support are vital for success. Whether you’re a beginner or a seasoned hobbyist, these resources guide you.
Online Forums And Communities
Online forums are treasure troves of information. Enthusiasts gather to share tips and experiences. Websites like Reddit and Stack Exchange host active electronics communities. They offer answers to common questions. Beginners find these platforms helpful and welcoming.
Participating in discussions enhances your learning. You can ask questions or share your projects. Engaging with others provides fresh perspectives. This interaction fosters a sense of belonging. It’s like being part of a global electronics club.
Educational Courses And Workshops
Educational courses offer structured learning paths. Many online platforms provide free and paid courses. Websites like Coursera and Udemy have beginner-friendly options. These courses cover basic to advanced topics. They often include hands-on projects.
Workshops are perfect for interactive learning. Local makerspaces and tech hubs organize them. Attendees gain practical skills in a collaborative environment. Workshops often focus on soldering, circuit design, and Arduino programming.
Accessing these resources ensures continuous growth. You build confidence and expertise. A supportive community and educational tools lead to success in your electronics journey.

Credit: www.reddit.com
Frequently Asked Questions
How To Set Up An Electronics Lab?
Choose a spacious, well-lit area with good ventilation. Equip it with a sturdy workbench, essential tools, and safety gear. Stock various electronic components and a reliable multimeter. Organize supplies for easy access. Ensure proper power outlets and grounding. Implement safety measures for handling electronics safely.
What Is The Cost Of Electronic Lab Set Up?
The cost of setting up an electronic lab varies. Basic setups start at $5,000, while advanced labs can exceed $50,000. Factors influencing cost include equipment type, lab size, and specific requirements. Research and budget accordingly for accurate estimates.
What Are The Basic Equipment For Electronics Lab?
An electronics lab needs essential equipment like a multimeter, oscilloscope, soldering station, power supply, and breadboard. Ensure to have resistors, capacitors, and transistors for circuit testing. Equip with wire strippers and cutters for efficient work. This setup supports various electronic experiments and projects effectively.
What Are The Basic Electronics Lab Precautions?
Follow safety guidelines: wear protective gear, avoid loose clothing, handle equipment carefully, disconnect power before repairs, and keep liquids away from electronics.
Conclusion
Creating a home electronics lab can be very rewarding. It offers hands-on learning and practical skills. You can experiment and build your own gadgets. This enhances creativity and problem-solving abilities. Plus, it’s a fun hobby for tech enthusiasts. With simple tools and guides, anyone can start.
You don’t need a lot of money or space. Just a desire to learn and explore. So, gather your tools and begin your journey today. Your home electronics lab awaits.